Sunday, December 18, 2011

Simply Seasonal

Hello there!

There are plenty of parties and events to attend this season, so I knew I had to start expanding my collection of Simply Adorned inserts!

Here is the newest pairing. I hope to get the chance and inspiration to make more soon!


I recently got the adorable Trinket Keys, attached one to my own necklace, used the rest to decorate a wedding card, and sent one to my cousin overseas as a Christmas gift. They are just that sweet! I just love miniatures, don't you?

I hope you all are having a wonderful winter so far. I'll see you soon!

Thursday, December 15, 2011

Clearance Rack Blitz

Hello there!

Did you really think that the great savings were over now that Black Friday was a thing of the (scary) past? Nope! Going on now, December 15th, until January 5th is a Clearance Rack Blitz! Order through me (or any demonstrator) and online qualify for discounts up to 80% off! There is no minimum purchase and it is only while supplies last.

Go check out the online shop as soon as you can!

Happy Hunting!

Wednesday, December 14, 2011

Holiday Perks

Season's Greetings!

Not only has the hectic holiday season been in full swing, so has flu season. I've been battling with my sinuses for the past two weeks but the gifts are out, the cards arriving, and the treats made.

I wanted to share our Christmas card for this year (Sorry for the poor lighting.):


The base is Crumb Cake card stock and the mat was a piece of Chocolate Chip embossed using the Northern Flurry Textured Embossing Folder Die (Mouthful, isn't it?). I misted on silver and gold that you don't often see right away until you tilt and move the card face around in the light. We loved the subtle Wow! factor.

The images and sentiment were from the Snow Swirled stamp set and embossed in silver and gold using my beloved Versamark watermark ink pad.  Inside, I used Chocolate Chip ink to stamp sentiments from the Many Merry Messages stamp set. I like doing slight variations of a card design to explore and because many cards go to people in similar places.

They were definitely handmade and I loved being able to try different products and while I layered new techniques, the card was only two physical pieces. I learned my lesson last year and made sure I had found a nice stamped sentiment for the inside of the card. I hated thinking of fluff words to fill some awkward space inside last time. Oh! That reminds me of the biggest difference between last year's and this year's cards: Another half! I had done a postcard-like card last year but was able to ween down the number of recipients and make full cards this year.

I go a little extensive and nuts planning out the stamp set, color scheme, and layout of my cards each year. I really involved my significant other and bless his heart, he did come up with ideas (that I ran with) and had a good chuckle over watching me running around like a madwoman in the process. It seems that I trend towards using snowflakes and non-traditional colors. So far, it's been neutrals with metallic-sparkly accents. I love the embossing and mists, all of the shine without the mess of glitter. Did I mention that I cranked out more than 50 of these suckers in a day and a half? Not even working all that hard. That alone is enough to make me love the design.

Speaking of design and inspiration, I also browsed and saved tons of ideas from the Stampin' Connection. It's a forum that's exclusively for Stampin' Up! demonstrators and I love it. I'm in the galleries 98% of the time but it just has so many ideas to go through!

Another amazing perk of being a demonstrator? The fact that I've already had my complementary preview copy of the Occasions Mini and Sale-a-bration catalogs for next year. Not only do I get to see what's coming in the next month, but I'm able to earn and order goodies from there months ahead of time! It gives us all the chance to explore, learn, and make fun crafts to share with all of you!

While I'm still working on preparing samples ahead of time, I can say that with some early Christmas money from my folks (Thanks, Mom & Dad!), I was able to order some of those items a little and will get them in next week to play with as a gift to myself! I cannot wait to show you sneak peeks.

That's all from me for now,

Monday, November 21, 2011

Online Extravaganza

Oh good gravy! Where has the time gone? I've always known that the holidays were a hectic time but this has been ridiculous. Sorry to leave you in the lurch!

Today is launching the Online Extravaganza from Stampin' Up! If you're comfortable with it, shopping online at this time of year is such a time saver. In the time it takes to drive from one big box store to another, you could have just clicked and visiting three times as many places.

Again, I apologize for being this news to you at the very last minute, it started at midnight last night and for a few more hours the NEW! Simply Scored and Sweetly Pressed Cookie Stamps are 20% off!

Here is a PDF file of all of the various items that are on sale until November 30th. It will open up in a new window. Many fun products that are great for the cozy holidays and there's even digital content on sale!

Or you can head straight to the store by clicking on that phrase or this image:
(There is no minimum amount you need to buy in order to get the discounts!)

Have fun shopping and I'll

Tuesday, October 18, 2011

Holiday Workshop

Ack! Hello there!

I thought I had already posted about my Holiday Workshop, my apologies. We had so much fun getting to relax with some delicious (mostly) homemade holiday-themed treats and play with crafting supplies that afternoon.
 Part of my display featuring projects from past workshops and some lovely paper roses!
 My first attempt using the masking technique for a Halloween Card.
An apron pocket I made for a friend whose birthday party was that evening.
I added two hand-written recipes to it later on. It was a busy day!

Pumpkin Rock Cookies for October-Autumn, Cranberry Nut Bread for November-Thanksgiving, and Ghiradelli Chocolate Brownies with sprinkles for December-Christmas were just some of the treats we made.

Many of the ladies that attended are teachers, so I chose very simplistic projects that represented three major holidays that are coming up (way too) quickly. This time, there was not a card in sight! A sour cream treat box stuffed with candy in Rich Razzleberry and Pumpkin Pie represented Halloween. An apple cider slider was a fun and easy gift idea in So Saffron and Pumpkin Pie that could easily converted to hold a gift card or hot chocolate instead was for Thanksgiving. Finally, we also made luminarias in Chocolate Chip and Wild Wasabi using the Ornamental Punch and Holly Berry Bouquet DSP. I managed to remember to take some pictures of completed projects to share! I'm pretty sure that I've already mentioned that this part is my favorite thing about workshops.
It was so much fun and I'm already looking forward to the next workshop! This was great motivation to bring down and put out all of our Halloween decorations sooner than we typically would have and now we get to enjoy them all month long.

Are you getting ready for the holidays yet?

Saturday, October 1, 2011

World Card Making Day

Hello again!

It's World Card Making Day and I have no new cards to show you! I do, however, have quite a bit of good news to share with you!

I'm sorry I'm going to make this so quick. We're going through a bit of a beloved kitty crisis right now but you really should know about the current amazing promotions Stampin' Up! has going on right now. Please, please, please contact me if you have any questions about the following announcements!

Holiday Clearance
(Only While Supplies Last!)
Discontinued items from holidays past are now available on the online clearance racks starting today and lasting only while the supplies are available. There are some pretty cute and handy items there, so make sure to check that out as soon as possible!

 Simple Sent:
Buy 2 & Get 1 Coordinating Stamp Set for FREE!
For this month only, when you buy any two of the Great Day, Everyday Elegance, or Sweet Moments kits, you can get the It's Your Day (in English, Spanish, and French), Everyday Wishes, or You're Cherished (in English and French) stamp sets for free! They are all on pages 192 and 193 of the Idea Book & Catalog. Super great place to start if you're new to card-making or even paper crafting because paper is designed and pre-cut for you.

 FREE BIG SHOT!
(Or $100 in Stampin' Up! Merchandise)
I am so jealous of this promotion going on for the month of October. When you sign up to join our family and become a demonstrator during this month, you will get a free Big Shot. Holy. Frijoles. Die cutting, embossing, and a plethora of other techniques will take your crafting to an entirely new level. If you are fortunate enough to already own one of these pieces of fine machinery, you will be able to get up to $100 of current Stampin' Up! goods sent to them for free with their Starter Kit. This means you get all of the handy bells and whistles that come with being a demonstrator such as access to our exclusive Stampin' Connection online community (full of tons of ideas and galleries), our discount, invited to the super fun conventions, and so much more but a Big Shot to boot! Keep in mind, you can always customize your Starter Kit (I did and I loved every bit of it!) to your personal tastes and needs.

October 1, 2011 until January 3, 2012
Bet you haven't thought about stamping your food yet, right? What an adorable way to add an extra bit of wow to your holiday baked goods than to use these interchangeable stamps. It comes with the sturdy wooden handle and three images of a jack-o-lantern, snowflake, and stylized heart. It's so sweet! No pun intended.

Sorry for the rush! Again, message me if you want to learn more. I'm currently prepping for my holiday workshop coming up later this month and I cannot wait to share with you the finished products! We'll be making a project inspired by the months of October, November, and December. 

Thursday, September 15, 2011

Adorable Storage

Hello all!


I wanted to show you what I'm now using as storage for all of my Simply Adorned inserts that I've been making. It makes for a great and simple gift!

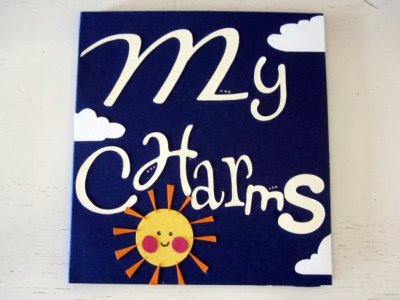
All thanks to Laura Denison of Following the Paper Trail: Her Gift Card Wallet design! She doesn't want us to embed her videos so you have to click on the link to watch the quick YouTube tutorial. She is so creative and lovely.  I may have cheated a little bit with my Very Vanilla lettering. While I used Stampin' Up! cards stock, I grabbed by beloved Cricut's Lyrical Letters and the images were inspired by Cricut's Simply Charmed.
These are themes from different classroom lesson plans. 
That is the gorgeous Pacific Point blue.
  I think I'm going to have much more of these in the future!
The pockets are the retired Bermuda Bay. It was my favorite.
 This one holds the generic everyday inserts.
This booklet is in Night of Navy. It was the base of my Christmas cards last year!
 I will probably add more monochromatic and personal themed inserts in the near future.
The pockets are in Very Vanilla.
 This sweet one features any holiday or seasonal inserts.
Again, this is in Bermuda Bay.
 There's not many now, but you know I have a bunch planned. 
I've only made it a third of the way through my preliminary idea list!
These pockets are also in Very Vanilla.
 
How sweet is that? It saves me from throwing them in a box and flipping through them like a deck of cards. I comfortably fit four per row, meaning that I can keep 24 inserts per booklet (or 12 coordinating pairs). The pockets are 1 inch deep and the entire thing is 5 x 5 inches when closed. 
After my first time making one, I realized I wanted to make sure I had enough give for a small spine and somehow the second one came out all crooked (it had a spine though!).
They peek out in the picture, but keep in mind that these tiny pieces are only 1 1/4 inches tall! They fit all snug and I can recognize what they are just by seeing a little bit of the top and slide them out with my thumb. 
Please let me know if you have any questions!

Tuesday, September 6, 2011

Simple Adoration

Hello, all!

I'm back! Just like I promised and I hope that you all had a lovely Labor Day weekend that was probably full of traveling, barbequing, and/or working on long overdue household projects. How's that for tradition?

Well, my shipment arrived Friday evening and I have been crafting (when I can) ever since! What I wanted to share with you is my customizable Simply Adorned jewelery from Stampin' Up! I had to put it back into the packaging so it's missing the tiny plastic bags but I wanted to show that each piece comes in a sweet Chocolate Chip box that's also great for decorating and gift-giving.


I am personally starting off with the 24-inch chain and the 1 inch by 1 1/4 inch charm. There's a shorter chain meant for bracelets and other charms in different sizes and you should check out the store yourself! They even introduced a few baubles and trinkets during the last Holiday Mini Catalog and I can't wait to add those to my growing collection.


Keep in mind that this is Stampin' Up! and as you can see in the picture above, you can decorate your chains with tiny charms, ribbon, and all sorts of goodies. I have seen some of the necklace chains with gorgeous satin ribbon weaved into the links and it's to die for! It shortens the length of the chain but that's okay in my book.

The charms are made of a nickel-plated zinc alloy and the chain is coated in the same alloy but is made of stainless steel. I believe this helps prevent allergic reactions that many people have to jewelry. The glass on the charm is beveled on one side but flat on the other and this allows for me to open up the locket and decorate both sides with inserts!

There's only so much space in between so that is something I have to keep in mind but I have had so much fun this past weekend making my inserts and I am no where near done. I had to tear myself away to start sharing them with you! They make such a beautiful and easy gift (or swap) because of their tiny size. It's right up my alley because I love nearly anything miniature. These have turned into my wearable canvases.

Note: They're not just for wearing! You can use them to accent beautiful home décor or to cards and scrapbook pages. A quick, simple, and classy way to get that "WOW" factor!


I make coordinating inserts in pairs and this is my experimental progression starting from the top pair. I found that I have a few favorite outfits that closely resemble with Rich Razzleberry and Bermuda Bay (now retired). I think that you can tell I'm new to stamping but I've liked the results so far! For the first and third pair, I actually used the cardboard that was wrapped around the Chocolate Chip boxes as my base.
Next, I realized that I wanted to have heavily themed inserts to wear to school because I have yet to develop the ultimate fun teacher-of-young-children wardrobe. As you can see, I am much more comfortable creating with my favorite products: the Card Stock and Stampin' Write Markers! I am free-hand cutting my paper sculptures because that's just how my brain works.
The themes are Ocean Animals (using some of the newest In-Colors: Island Indigo, Pool Party, and Wisteria Wonder) - Autumn (I'm "falling" in love with using Regals, hardy har har) - and Dinosaurs (I am no paleontologist!)
My absolute favorite out of the bunch I've made so far is this one:
Space! It's not so much that I'm obsessed with space, but how proud I am of the detail and thought put into this pair. One side is my "Don't worry Pluto, I'm not a planet either." and the other is the rest of the solar system! I have to get a little creative in fitting all of the planets but I'm still in love with the end product. 
 How adorable is that?!

I like to put the more detailed of the inserts on the flat side or showcasing one on the beveled side because it just makes things look that much fancier.

On the back of each insert, I try to jot down the date, as many of the colors that I used that I can fit, and sign my little piece of artwork. Like I said earlier, I am so proud of the progression and finished product!

I'm dying to get back to making more because I have so many ideas blazing through my head right now. Please let me know if you have any questions! Even if it's just what colors I used.

Thursday, September 1, 2011

Holiday Mini Catalog

Hello, All!

Sorry for disappearing during the end of the summer. I was away visiting family across the country in Florida and, well, I'm sure you understand the rest! It's been hectic and hot.

While I almost have something really fun to show you, it's not quite ready yet. Next week! In the meantime, I wanted to let you know that the new Holiday Mini Catalog has gone live! Click on the picture below to check out the PDF version.

September 1, 2011 - January 3, 2012

It never ceases to amaze me how versatile Stampin' Up!'s supplies continue to get. I think I would describe this year's overall feel as comforting-cozy and modern. Just when I think that I won't be crazy about any new product because I've grown attached to the tried and true, they surprise me and I hope you feel the same way.

I promise to show off my new project, so

Friday, July 1, 2011

Welcome IB&C!

Hip hip hooray!

The day has finally arrived! The new Idea Book & Catalog for the 2011-2012 year has finally launched. Check that out here (image & text linked) or more on my Idea Book + Catalogs page:


Where do I even begin? There are even more creative ideas for all sorts of projects, the stamp artwork just keeps getting better & better, the organization is even more pleasing to the eyes & mind, there is a new hostess benefits system (no more levels!), and many of our favorites from the past year's worth of mini catalogs have made it into the regular rotation!

I have been absolutely drooling for the past few weeks because I was able to get my free copy of the catalog ahead of time as a demonstrator. If you'd love to have a perk like that plus discounts on Stampin' Up! products, you will probably love to hear about the month-long promotion we're having for a Starter Kit that only costs $99! Check out my Join Stampin' Up! page for more information or just Contact Me for all of the great details.

I'm sorry for not getting all of this news to you earlier. It's been a rough few days in our household because the family dog was bitten by a rattlesnake. You tend to just drop everything and forget about it while coming together as a family for family. I know you all understand. Those events plus the release of the new catalog inspired me to whip out this card earlier:


New colors and new stamps! I hope you check out the new IB&C soon and "Imagine the Possibilities" with me. It's all so refreshing!

As usual, if you have any questions or just want to gush over the new products with me, feel free to contact me.
- - - - -
The Recipe:
 - Stamping -
Delicate Doilies (New!)
& Word Play
 - Paper -
Pool Party (In Color 2011)
 - Ink -
Island Indigo Classic (In Color 2011)
Pool Party Classic (In Color 2011)
Whisper White Craft (Neutral)
Wisteria Wonder Classic (In Color 2011)

Tuesday, June 21, 2011

More Sneak Peeks!

-- Keep checking out the Last Chance Lists
Only a little over a week to grab your favorites before we have to say farewell!--

Hey there!

I don't have the exact project I promised from last time, but I do have more sneak peeks of new goodies from the upcoming 2011-2012 Idea Book & Catalog! It's definitely card-making time for me with all of the events that I'm not able to attend this year. I hope to keep saving up and not miss out anymore! One can dream, right?

The first is a sweet and simple graduation card for my cousin. Her favorite color is purple while her school colors were blue and white. The sentiment was the Word Play stamp set was colored in using Stampin' Write markers. That's one of the new In-Colors for 2011, Island Indigo framing the popped up message.

The second card was more of an playful experiment than a mission, but I wanted to share it anyways because crafts are supposed to be fun. Or I can claim I did it all on purpose and wanted to give it a "handmade touch." Ha!

A Circus of Color!

I wanted to challenge myself one day by making a Basic Black card and I know I wanted to show you all the new In-Colors. This is the hybrid product of those ideas! It was ton of fun using Whisper White Craft ink but messy though because I was too overzealous. I separated the images of the retiring Baby Steps stamp and made this balancing act. From the top ball, the colors are: Pool Party, Calypso Coral, Island Indigo, Wisteria Wonder, & Lucky Limeade! Very fresh and fun and perfect summer colors.

I hope that whets your appetites just as much as it did mine!
- - - - -
The Recipe:
- Stamping -
Baby Steps (Retiring 2011),
Word Play,
Greenhouse Garden, &
Sprinkles (Retired 2010)
- Paper -
Basic Black (Neutrals, Getting Started),
Brights Patterns DSP Stack,
Calypso Coral (In Color 2011),
Concord Crush (In Color 2010),
Island Indigo (In Color 2011),
Lucky Limeade (In Color 2011),
Pool Party (In Color 2011),
Wisteria Wonder (In Color 2011),
& Very Vanilla (Neutrals)
 - Ink -
Versamark &
Whisper White Craft (Neutral)
 - Stampin’ Write Markers -
Brights Assortment &
In Color 2010 Assortment
- Punching -
1” Circle Medium
- Adhesive -
SNAIL Adhesive
Stampin’ Dimensionals (300 pack)
 - Extra -
 Cutter Kit &
old (non-SU) star punch